W13(憑證) <<
Previous Next >> W15-17(小組研究)
W14(更改&編輯Blogger)
接續上週,但有edit功能
blogger
https://2019wcm.blogspot.com/search/label/blogger
影片
https://drive.google.com/file/d/13KBfWIMULL9fAPw-T54cExMt9GUTW4XZ/view
1. 開啟編輯器預備
2. 打開黑黑的窗格(我還是習慣這樣叫ww),git submodule:
pip install google-api-python-client
pip install oauth2client
3. 將下列程式碼打進編輯器:
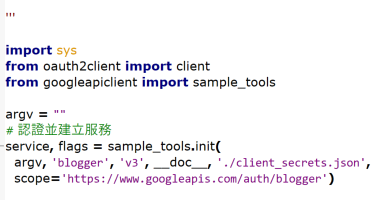
import sys
from oauth2client import client
from googleapiclient import sample_tools
argv = ""
service, flags = sample_tools.init(
argv, 'blogger', 'v3', __doc__, './client_secrets.json',
scope='https://www.googleapis.com/auth/blogger')
try:
users = service.users()
user = users.get(userId='self').execute()
print('網誌名稱: %s' % user['displayName'])
blogs = service.blogs()
blogs = blogs.listByUser(userId='self').execute()
for blog in blogs['items']:
print(blog['name'], blog['url'])
posts = service.posts()
body = {
"kind": "blogger#post",
"id": "123",
"title": "透過 Python 程式新增網誌文章1",
"content":"使用 Google Blogger API 可以利用程式新增網誌文章內容1"
}
insert = posts.insert(blogId='123', body=body)
posts_doc = insert.execute()
print(posts_doc)
except(client.AccessTokenRefreshError):
print("error")
4. 在tmp存檔,名稱後面加上.py讓它認得出這python
5. 將"blogid": "123",改成自己的Blogger ID

6. 將"postid": "456",改成那篇文章的ID
7. 依照自己要上傳還是修改,使用 #上傳網誌文章時的 body 或 #更新網誌文章時的 body
"'三引號是多行標註的方法"'
8. './client_secret.json' ,client_secret.json就是上周做的憑證的檔名,./是指在同一個資料夾
8. Tools > Go
W13(憑證) <<
Previous Next >> W15-17(小組研究)